Quickstart Guide
Go from installation to your first live data pull in about five minutes. Pick your product below and follow the steps.
G-Integrator for HubSpot
Pull Contacts, Companies, Deals, Tickets, Products, Line Items, custom objects and HubSpot analytics into Google Sheets — and push edited rows back.
Install the add-on
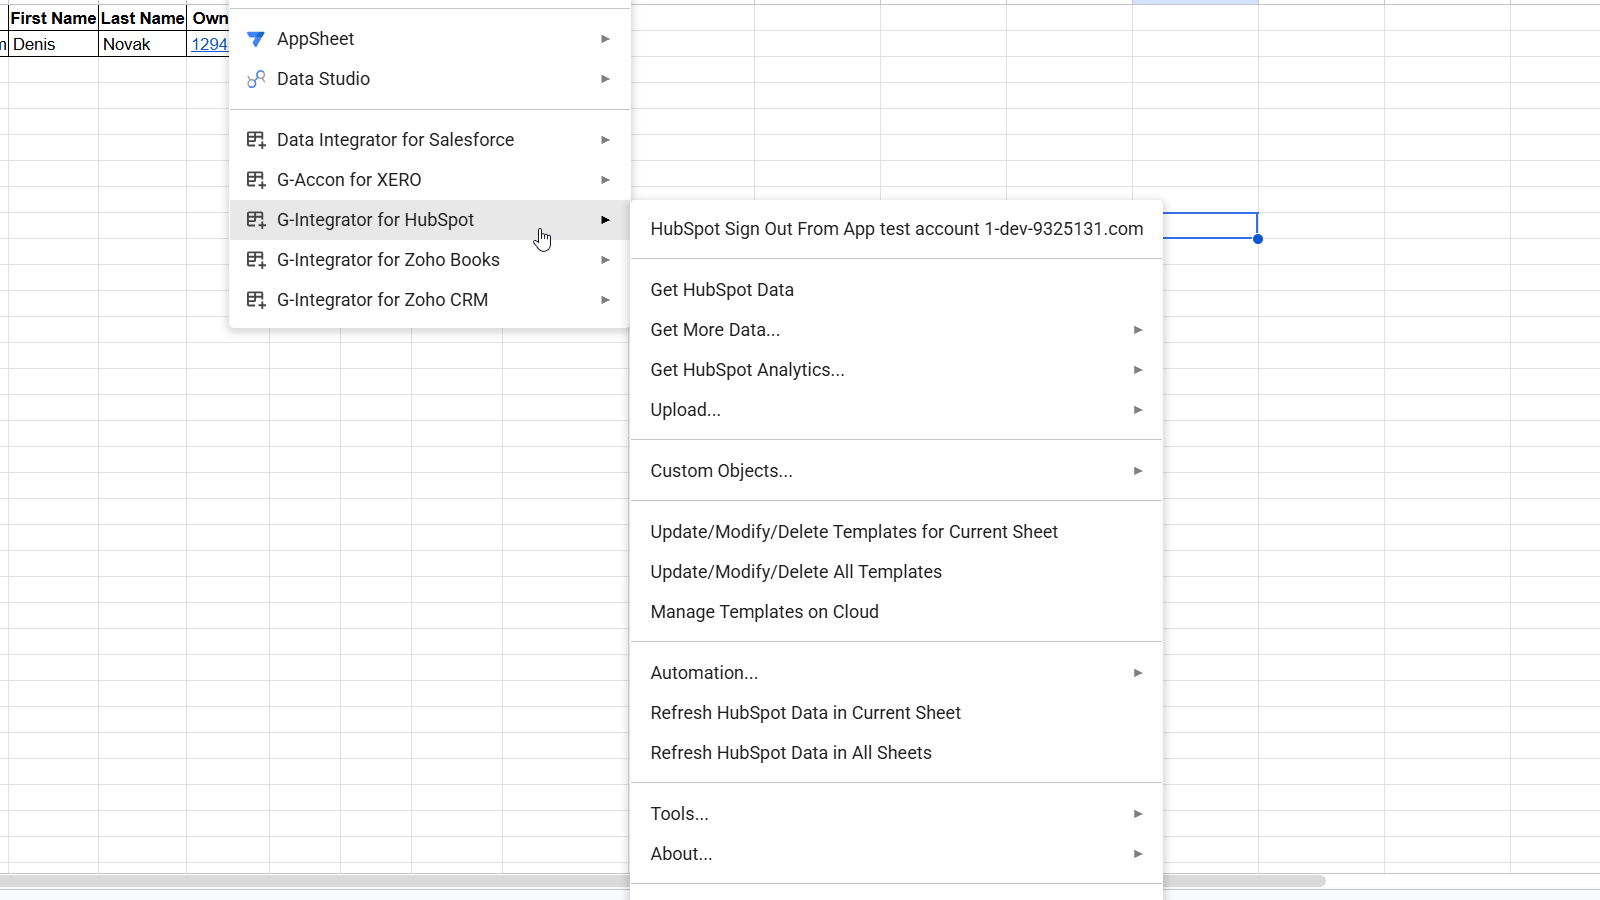
Install G-Integrator for HubSpot from the Google Workspace Marketplace. Open any Google Sheet — the add-on appears under .
Sign in to HubSpot
Click . A dialog titled Login to HubSpot opens; approve the app in the HubSpot authorization tab. When you return, the connection is confirmed automatically and the menu shows HubSpot Sign Out From [Your Company].
Pull your first data set
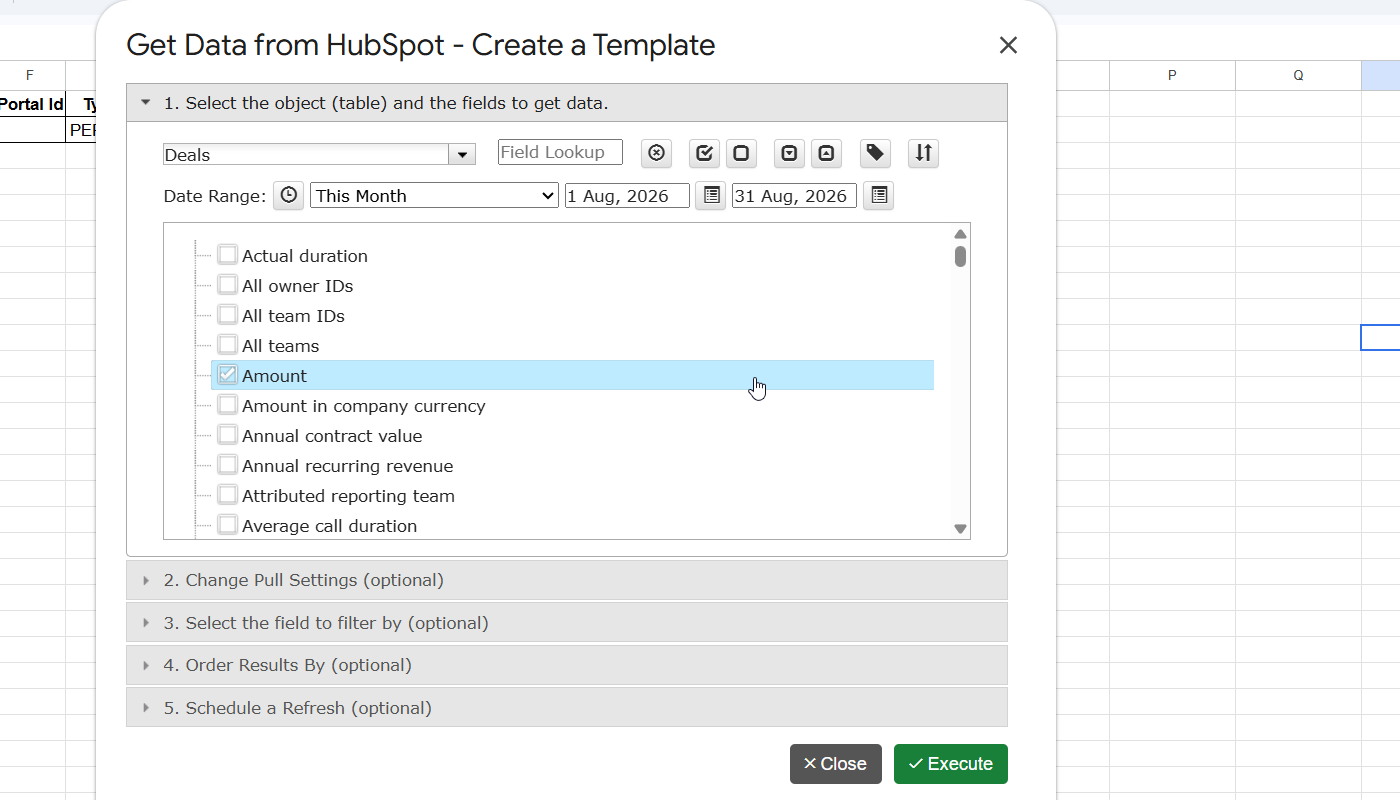
Click . In the Get Data from HubSpot - Create a Template dialog:
- Select the object and fields — e.g. Contacts, Companies or Deals, then check the columns you need.
- Pull settings (optional) — start cell, headers, deep links to HubSpot, data table formatting.
- Filters and ordering (optional) — filter by field values or record IDs, sort the results.
Click Execute. The data lands in your sheet and the pull configuration is saved as a reusable template.
Keep it fresh (optional)
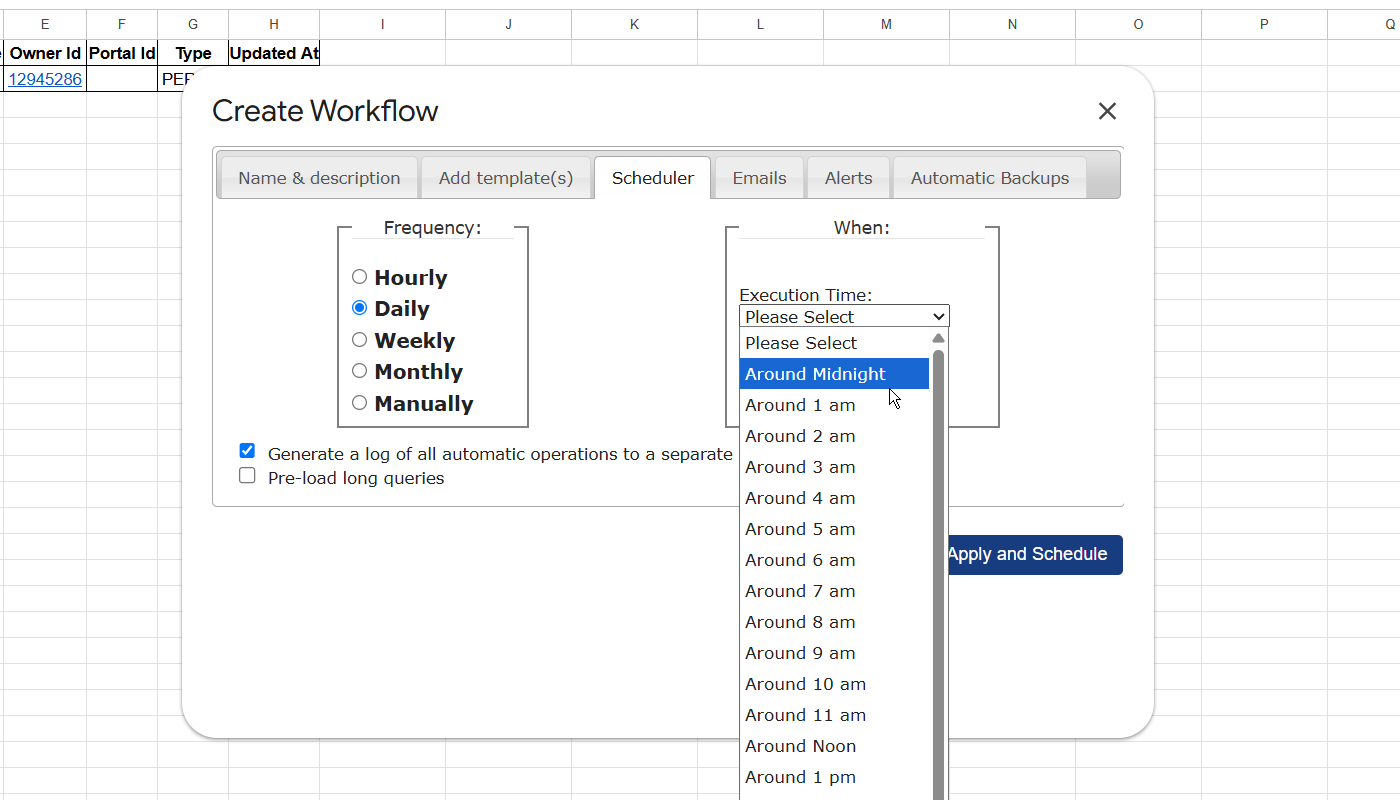
Use to refresh your saved templates on a schedule (hourly to monthly) with optional email notifications. Or push edited rows back with using Insert, Update or Upsert.
Next steps: HubSpot Help Center · FAQ · Pricing
G-Integrator for Zoho CRM
Pull any Zoho CRM module — Contacts, Leads, Accounts, Deals, Tasks, custom modules and related lists — into Google Sheets, run Zoho Analytics reports, and push changes back.
Install the add-on
Install G-Integrator for Zoho CRM from the Google Workspace Marketplace. Open any Google Sheet — the add-on appears under .
Sign in to Zoho
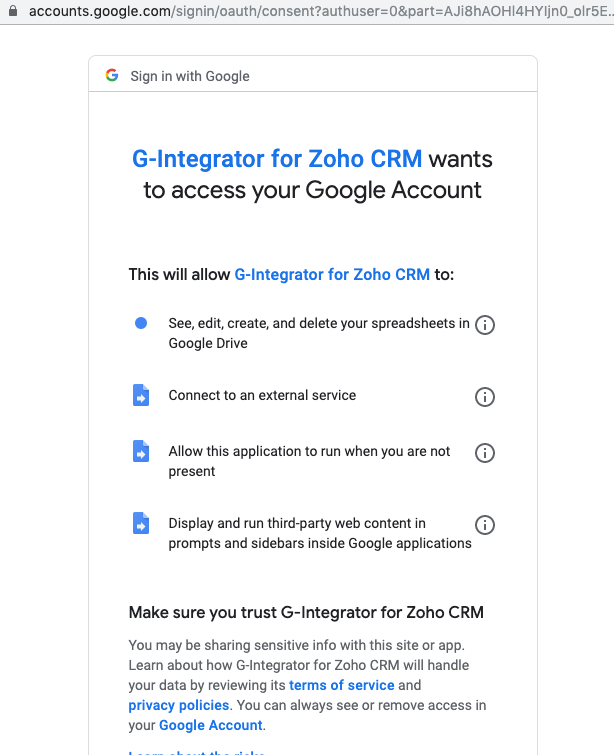
Click and press the Sign In button in the dialog. Approve the app in the Zoho tab that opens, then return — the connection is confirmed automatically and the menu shows Sign Out from [Your Company].
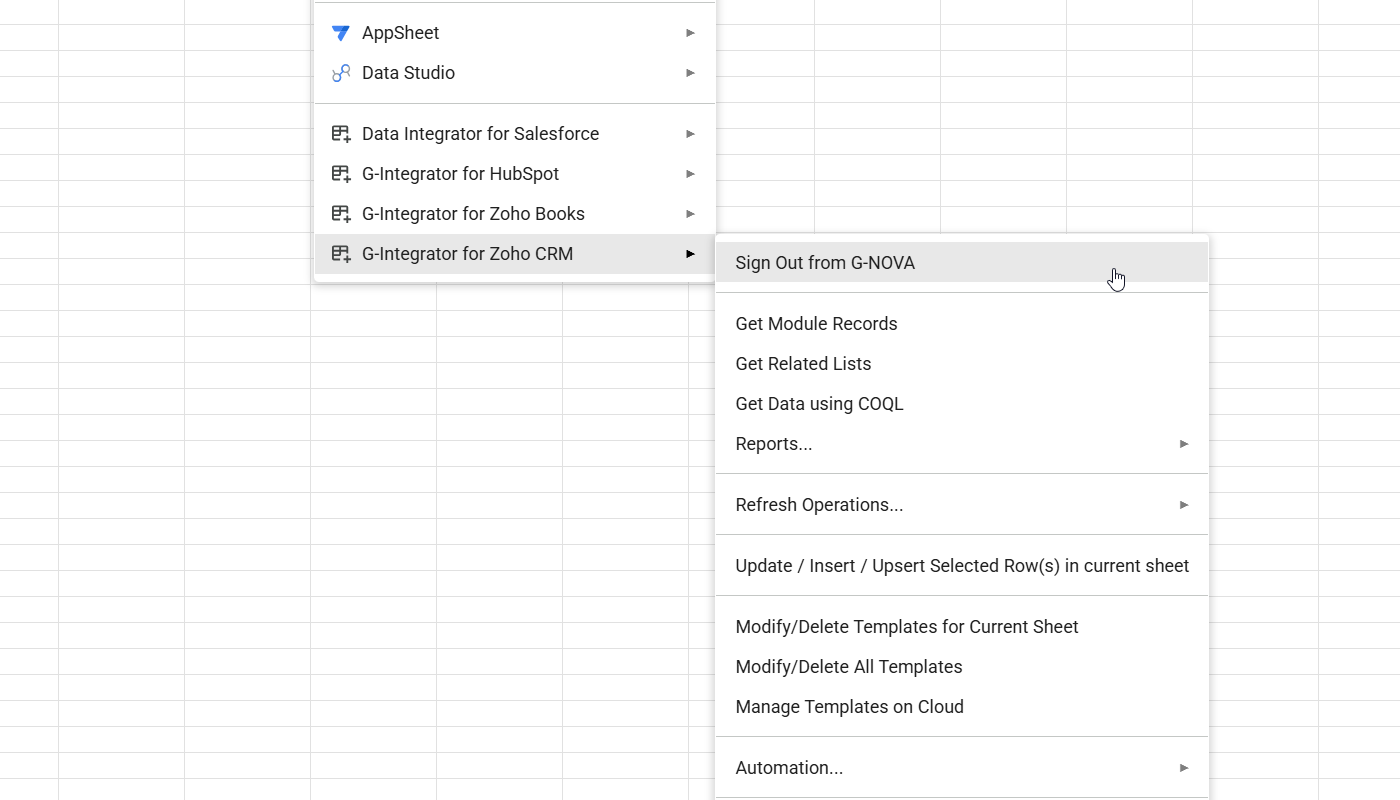
Pull your first module
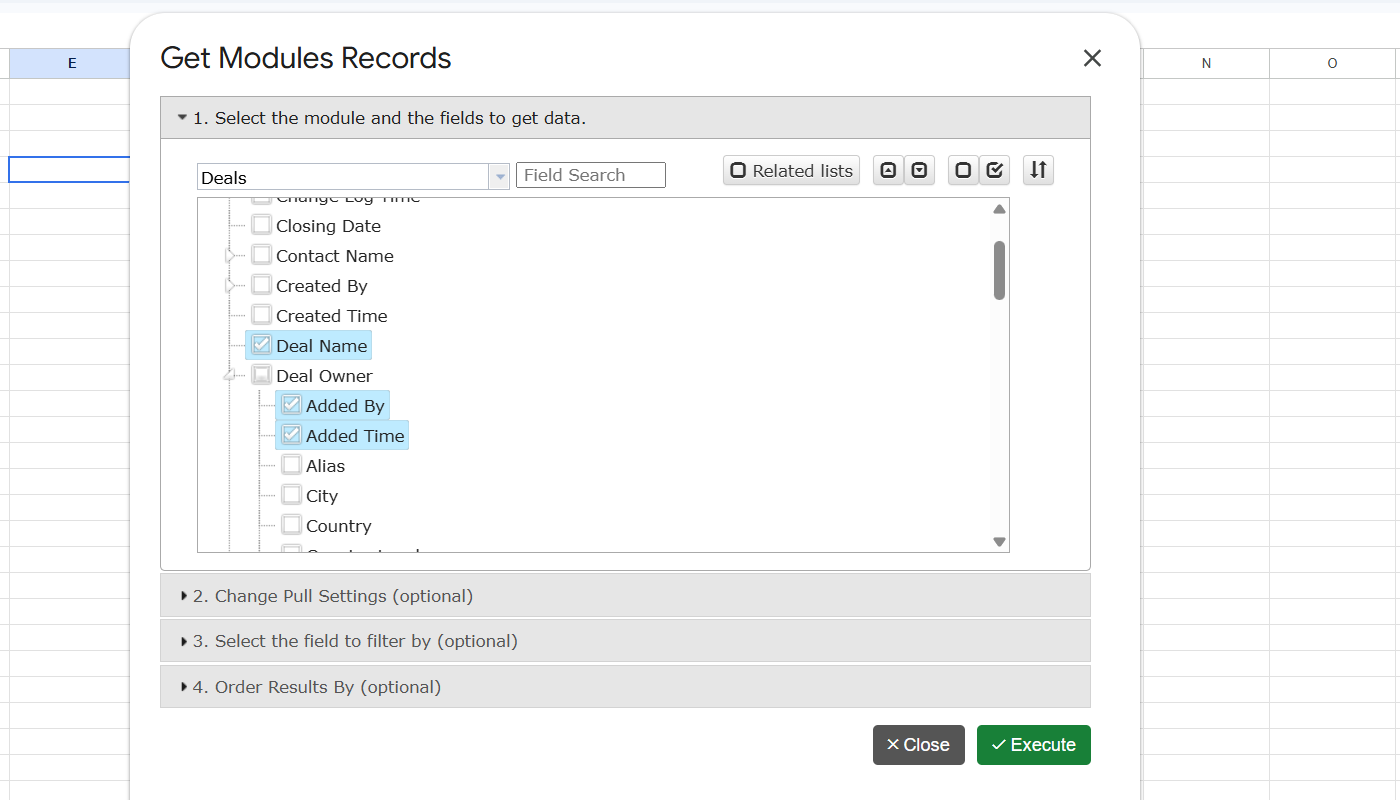
Click . In the dialog:
- Select the module and fields — pick Contacts, Deals, Leads or any other module in the field tree, with search, expand/collapse and select-all helpers.
- Pull settings (optional) — start cell, headers, new sheet, frozen header row, duplicate removal.
- Filters and sorting (optional) — combine multiple field filters.
Click Execute. Records appear in the sheet and the configuration is saved as a pull template you can refresh any time.
Automate and sync back (optional)
Use to refresh templates on a schedule, or select edited rows and click to push changes back to Zoho CRM. Power users can query with .
Next steps: Zoho CRM Help Center · FAQ · Pricing
G-Integrator for Zoho Books
Bring your accounting data — Invoices, Bills, Expenses, Chart of Accounts, Bank Transactions and 25+ other Zoho Books tables — into Google Sheets for reporting and analysis.
Install the add-on
Install G-Integrator for Zoho Books from the Google Workspace Marketplace. Open any Google Sheet — the add-on appears under .
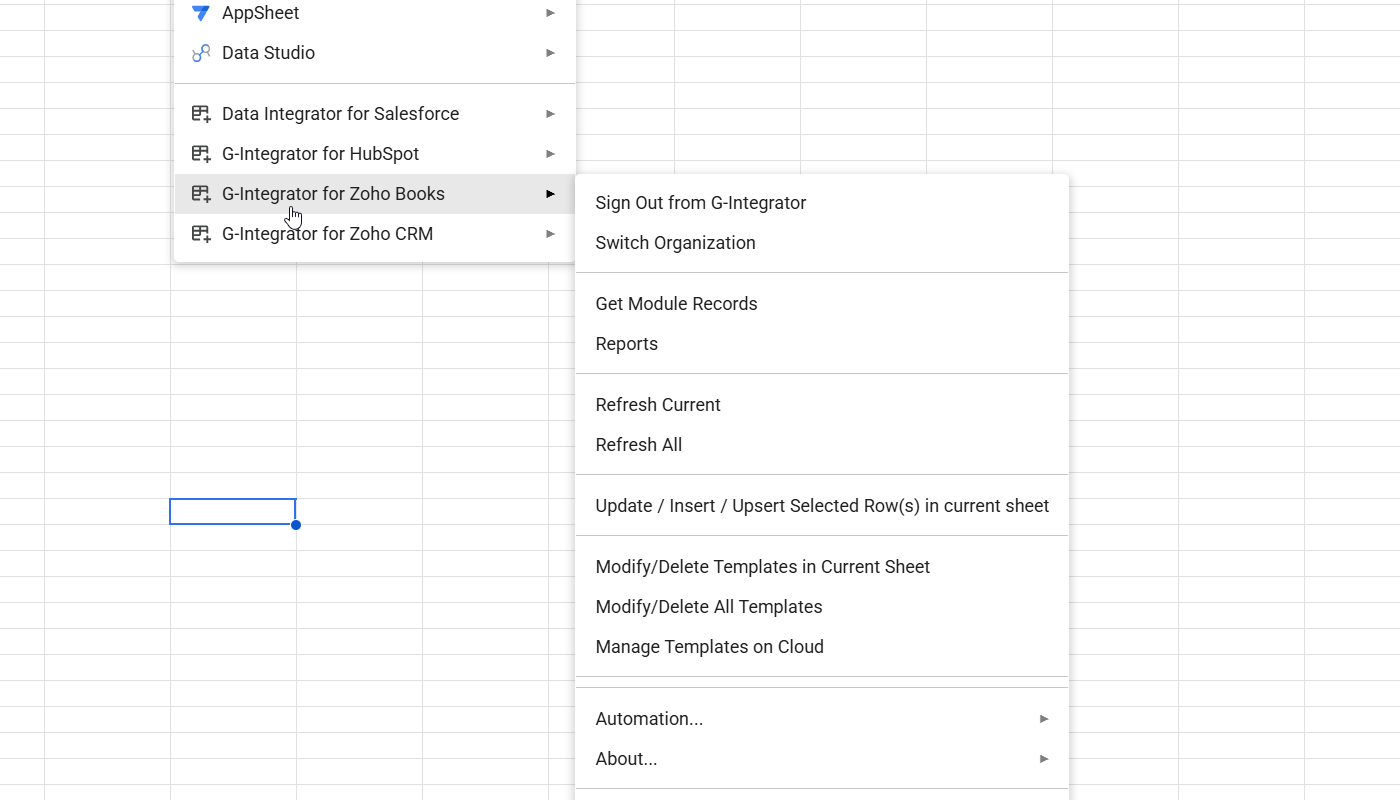
Sign in and pick your organization
Click , approve the app in the Zoho tab, and return to the dialog — the connection is confirmed automatically. If you manage several Zoho Books organizations, you can switch between them per sheet.
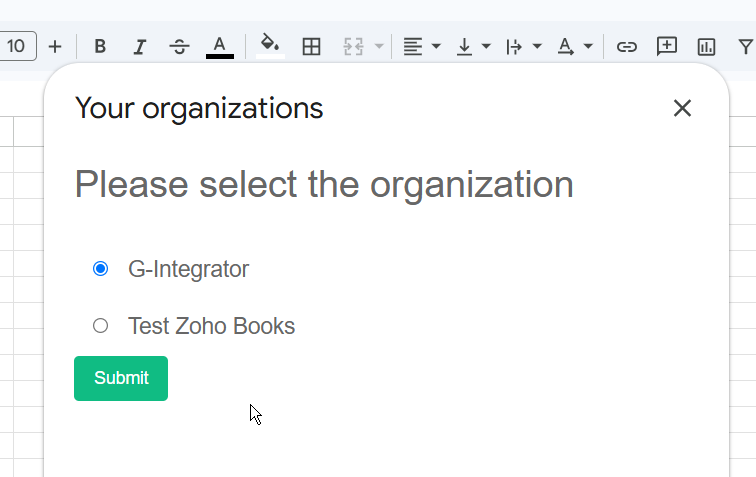
Pull your first table
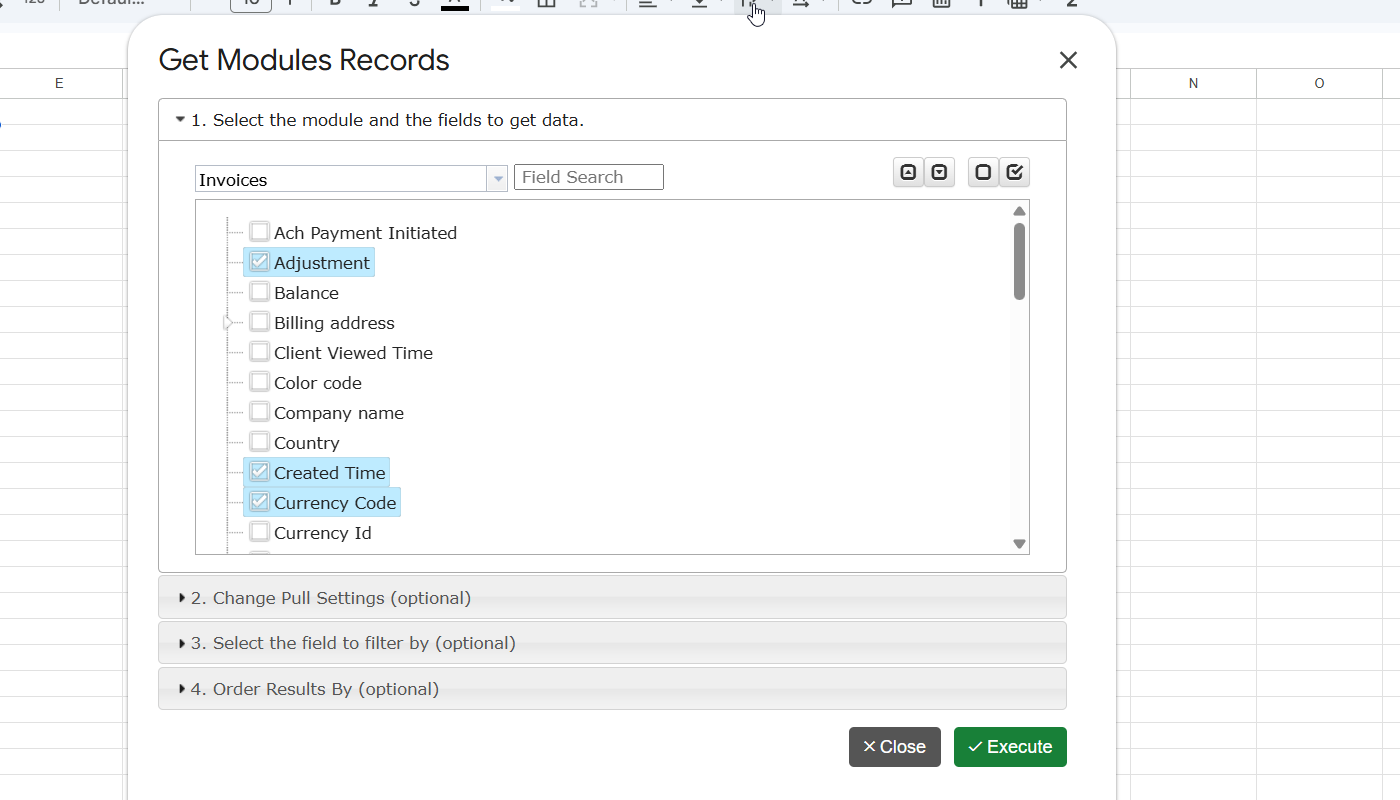
Click and select a Books table — for example Invoices, Bills, Expenses or Chart of Accounts. Choose the fields, set the start cell and formatting options, then click Execute. Line items are flattened into rows automatically, and the pull is saved as a refreshable template.
Report and automate (optional)
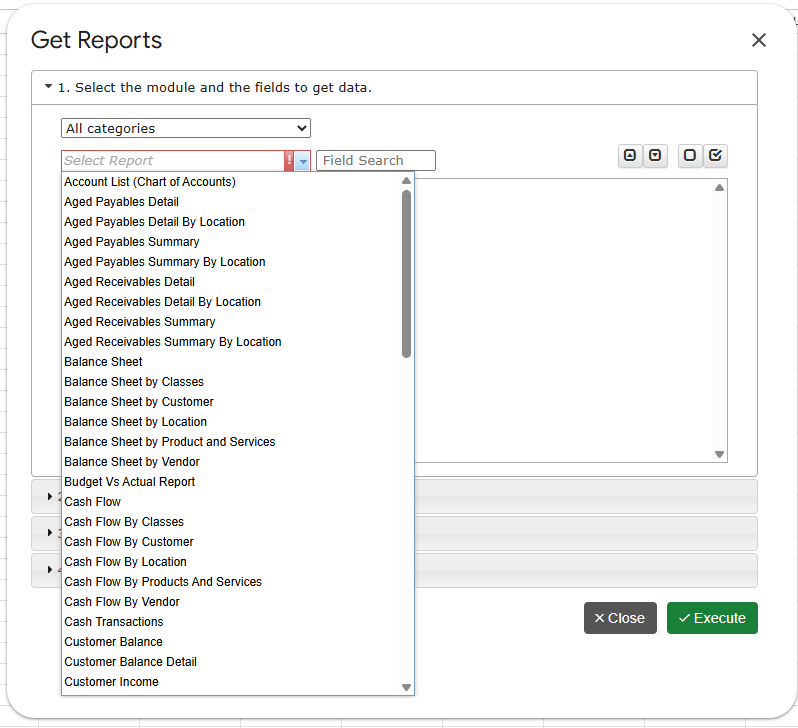
Run built-in custom reports — Aged Receivables, Aged Payables, Budget vs. Actual, Product Margin, Customer and Project Profitability, Expense Breakdown, Estimate Conversion Rate and Sales by Salesperson — from the menu. Schedule automatic refresh via so your sheets always match your books.
Next steps: Zoho Books Help Center · FAQ · Pricing
G-Integrator for Shopify
Export Orders, Products, Customers, Draft Orders, Collections, Locations and Price Rules from your Shopify store into Google Sheets — with scheduled workflows, alerts and backups.
Install the add-on
Install G-Integrator for Shopify from the Google Workspace Marketplace. Open any Google Sheet — the add-on appears under .
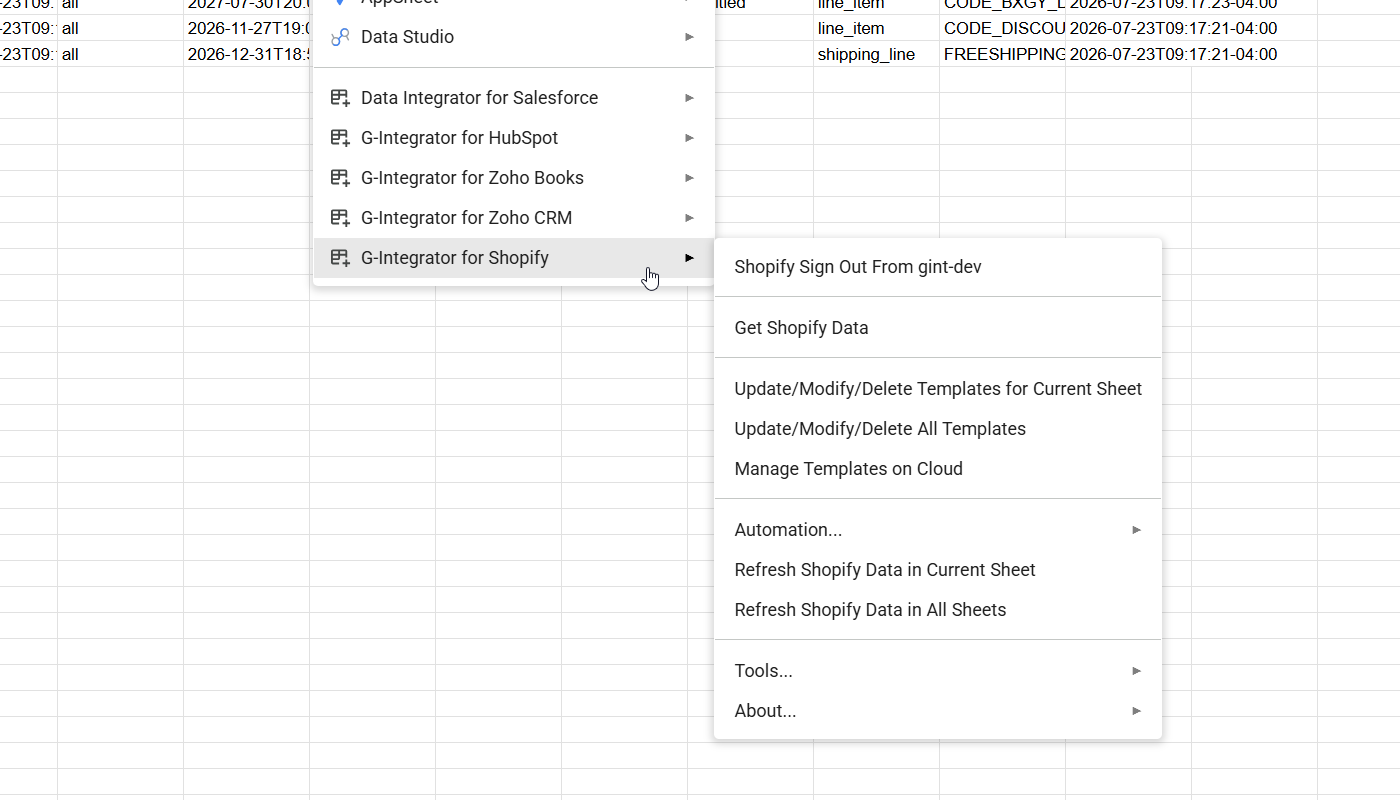
Connect your store
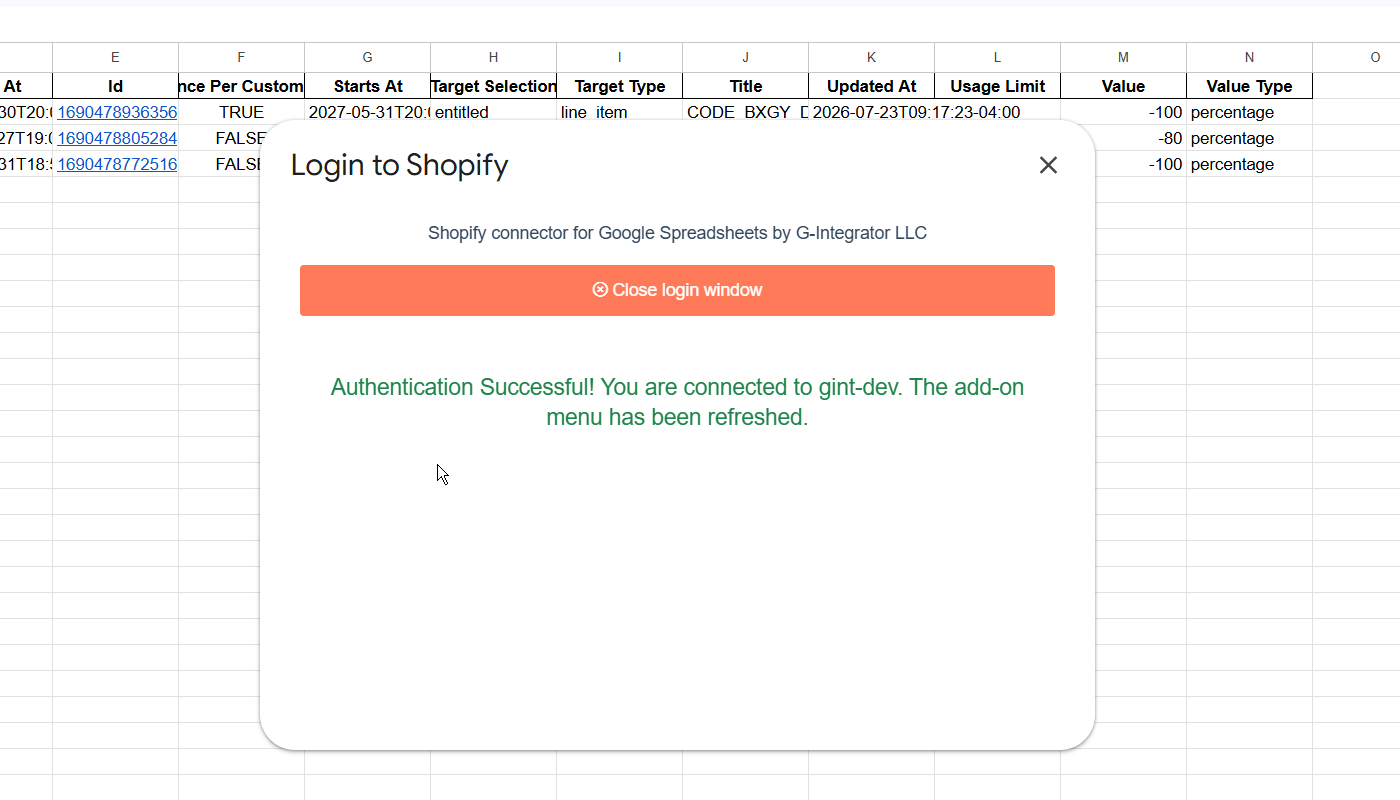
Click . In the Login to Shopify
dialog, enter your store domain (e.g. your-store.myshopify.com) and click
Log in. Approve the app on the Shopify permission screen — the dialog
confirms "Authentication Successful! You are connected to [your shop]".
The connection is permanent; no re-authorization is needed unless you disconnect.
Export your first data set
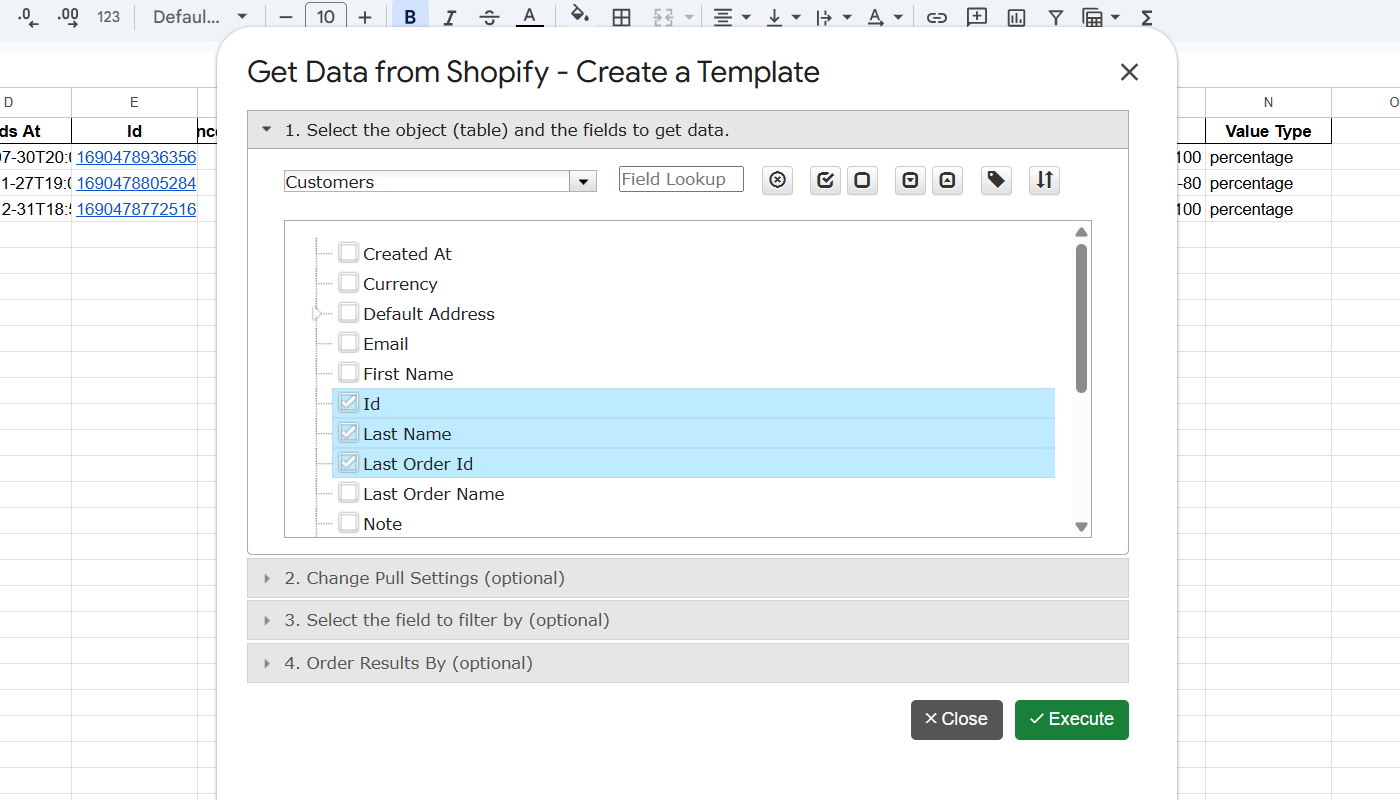
Click . In the dialog:
- Select the object and fields — Orders, Products, Customers, or nested data like Line Items, Shipping Lines, Tax Lines and Discount Codes.
- Pull settings (optional) — start cell, new sheet, headers, data table, deep links to your Shopify admin. Add a template name to save the query.
- Filter and sort (optional) — by field values, date ranges or record IDs.
Click Execute — your store data appears in the sheet, formatted and linked back to Shopify.
Automate it (optional)
Use to run saved templates on an hourly, daily, weekly or monthly schedule — with email notifications, cell-value alerts and automatic timestamped spreadsheet backups.
Next steps: Shopify Help Center · FAQ